Key Takeaways
- It starts with a brief, not a printer. A good shop interviews you about goals, audience, and brand vibe, then builds a layout that’s legible in 3 seconds at street speed.
- Measure twice, template once. They use model-specific templates and real-world measurements to place headlines away from door gaps, handles, and fuel doors.
- Pro materials matter. Most premium wraps use cast vinyl with a matching UV laminate. Cast films stretch cleanly over curves and resist shrinking better than cheaper calendared vinyl.
- Color you can trust. Designers soft-proof and run test swatches so what you approved on screen actually matches what rolls off the printer—no “Why is my red tomato soup?” surprises.
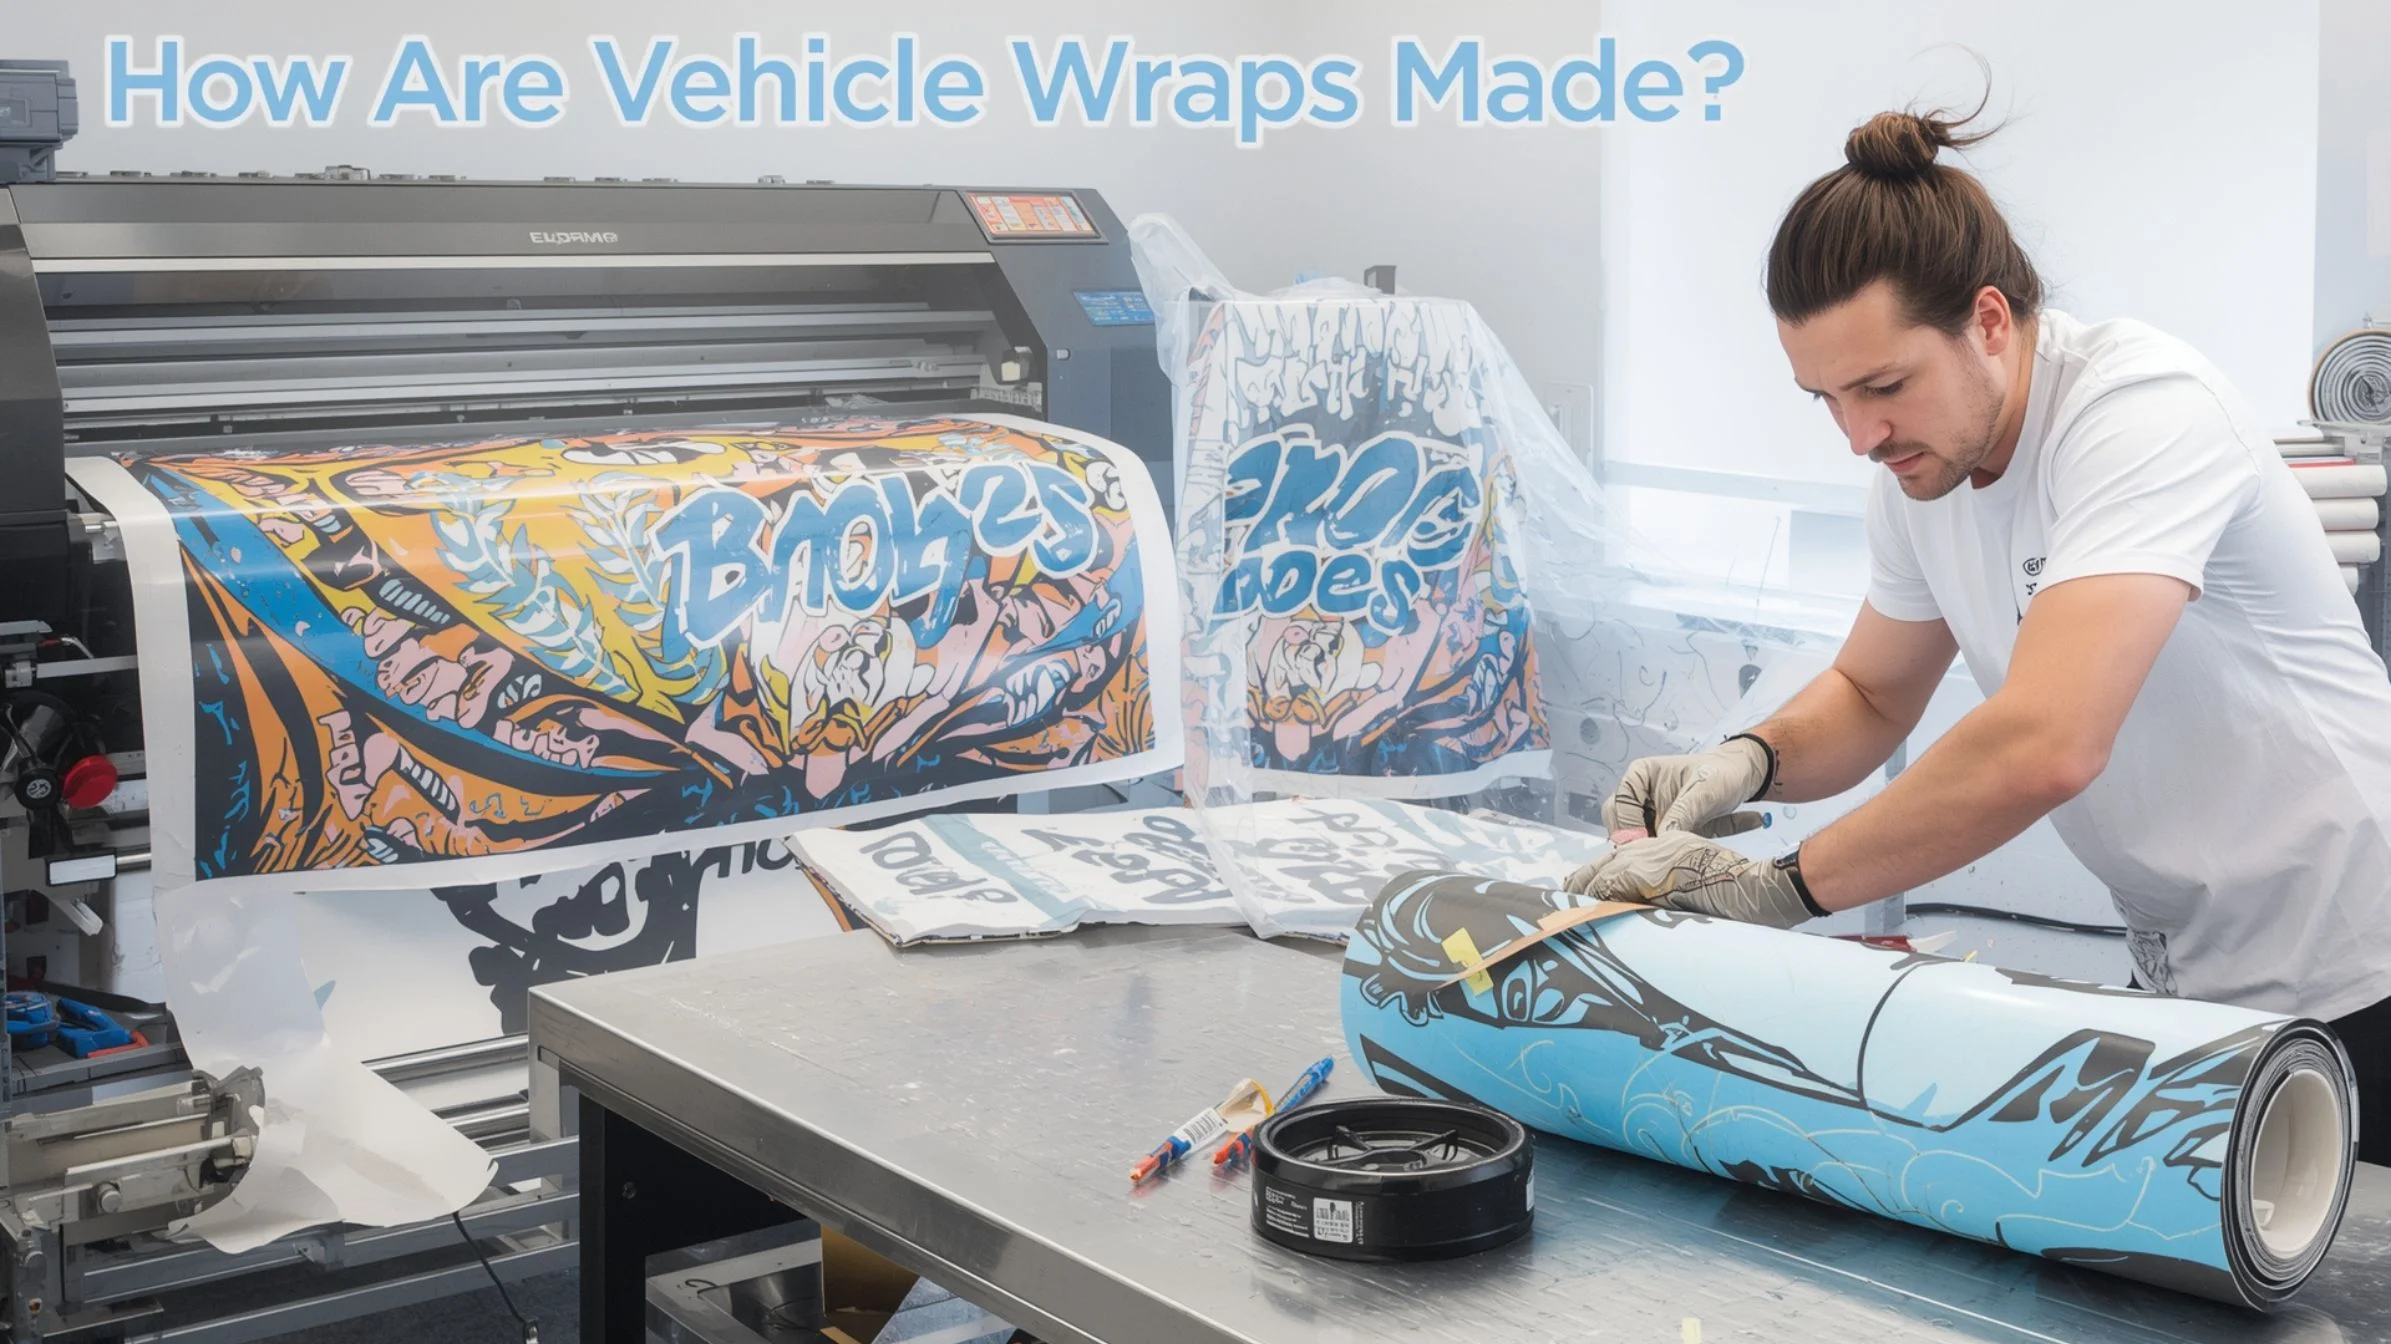
- Print, off-gas, laminate. After wide-format printing (eco-solvent/latex/UV), panels off-gas so inks cure, then get laminated for gloss, durability, and easier squeegeeing.
- Smart paneling beats patchwork. Graphics are split into overlap-friendly tiles, with seams hidden along body lines to minimize wind lift and visual breaks.
- Prep makes perfect. The car gets a deep wash, clay bar, and alcohol wipe; badges and trim are removed, and installers map out hinge points with magnets and tape.
- Heat, stretch, and seal. Installers warm vinyl to conform, post-heat recesses to ~90°C (195°F) to lock memory, tuck edges 3–5 mm, and use knifeless tape so no blades touch paint.
- QC and cure. Final inspection for bubbles or lift, edge-sealer where needed, then a 24-hour cure before car washes. My first full wrap? I parked it overnight and came back to a mirror-smooth finish—worth the wait.
Vehicle wraps are made through a design-to-installation workflow: define goals, build a scalable layout on model-specific templates, print on cast vinyl, allow inks to off-gas, add a protective laminate, then install panel by panel on a meticulously prepped vehicle using heat, squeegees, and knifeless tape. Pros post-heat recessed areas to about 90°C (195°F) to prevent shrink-back, hide seams on body lines, and finish with edge sealing and quality checks—delivering a durable, paint-safe, custom look.
Introduction
There’s something magical about watching a vehicle go through a transformation. One moment, it’s just another car or truck on the road, and the next, it’s a mobile work of art—covered in vibrant designs, sleek finishes, and sometimes even bold business logos. As someone who’s been involved in the vehicle wrap world, I can tell you that this process is far more detailed than most people think.
From designing the perfect template to making sure every corner of your vehicle is covered seamlessly, wrapping is where creativity meets precision. In this article, we’ll walk through every step of how vehicle wraps are made, giving you an inside look at the magic behind turning an ordinary vehicle into something extraordinary.
What Are Vehicle Wraps?
The Basics of Vehicle Wraps
A vehicle wrap is essentially a large, printed vinyl graphic that can be applied to all or part of a vehicle. These wraps allow businesses to turn their fleet into mobile billboards or individuals to customize their cars without permanent alterations. Wraps can cover the full body of a vehicle or be applied to specific sections, like the hood or doors, depending on the look you’re going for.
Types of Vehicle Wraps
- Full Wraps: Covers the entire vehicle from bumper to bumper.
- Partial Wraps: Targets specific areas like the sides or back of the vehicle.
- Decals: Small graphics or logos applied in select areas.
Rea d also: How Much Does It Cost to Wrap a Car?
The Design Phase: Crafting the Perfect Wrap
The Importance of a Good Design
Design is the foundation of any great vehicle wrap. You want something that grabs attention but also communicates your message clearly. Working with a professional designer is usually the best route because they’ll help turn your ideas into a layout that fits perfectly on your vehicle.
Tools and Techniques for Vehicle Wrap Design
Designing a wrap involves specialized software like Adobe Illustrator or CorelDRAW, allowing designers to create custom templates that match the exact dimensions of your vehicle. This is crucial to ensure that the wrap fits every curve, contour, and detail, minimizing distortion.
Key Elements of a Great Design
- Color and Contrast: Eye-catching yet professional.
- Branding: Incorporating logos, fonts, and consistent themes.
- Visibility: Making sure the text is readable from a distance.
Material Selection: Choosing the Right Vinyl
Types of Vinyl
Choosing the right material is vital for the longevity and quality of your wrap. Vinyl comes in various grades, with two main types: cast vinyl and calendared vinyl.
- Cast Vinyl: Thinner, more durable, and better for complex surfaces like curves and rivets.
- Calendared Vinyl: Thicker and less expensive but more prone to shrinkage and is ideal for flat surfaces.
Factors to Consider
- Durability: For long-lasting wraps, cast vinyl is usually the preferred option.
- Finishes: Gloss, matte, satin, and textured finishes are available.
- UV Resistance: This helps protect the wrap from fading due to sun exposure.
Read also: Are Vehicle Wraps Covered by Insurance?
Printing the Wrap: Turning Digital Designs into Reality
Once the design is finalized, it’s time to print the wrap. This requires large-format printers that can handle the full length and width of the vehicle. High-resolution printing ensures that the colors are vivid and sharp, with no pixelation or blurriness.
Color Matching and Quality Control
- Resolution: Maintaining at least 720dpi for crisp results.
- Color Calibration: Ensuring the colors on the print match what you see on the screen.
- UV Inks: Prevent fading, especially for vehicles exposed to harsh sunlight.
Prepping the Vehicle: Surface Preparation for a Flawless Wrap
The Importance of Surface Preparation
A successful wrap starts with a clean, smooth surface. Dirt, grime, wax, and even minor imperfections can prevent the vinyl from adhering properly.
Steps to Proper Preparation
- Cleaning: Thoroughly wash and degrease the vehicle.
- Surface Repairs: Address any dents, scratches, or chips.
- Disassembly: Remove mirrors, badges, and door handles for better coverage.
Read also: DIY Vehicle Wrap
Installation Process: Wrapping the Vehicle
Step-by-Step Installation
- Flat Surfaces First: Begin with large, flat areas like the hood or doors.
- Heat Application: Use a heat gun to stretch the vinyl over curves and edges.
- Squeegee Technique: Remove air bubbles and ensure a smooth application.
Tackling Complex Areas
Wrapping around rivets, door handles, and tight corners requires expertise. By applying controlled heat, the vinyl can be manipulated to conform perfectly to these challenging surfaces.
Post-Installation: Finishing Touches and Curing
Final Adjustments
- Trimming: Carefully cut away excess vinyl around edges.
- Sealant: Apply edge sealants to ensure the wrap lasts longer.
- Curing Time: Allow 24-48 hours for the vinyl to fully adhere to the vehicle.
Maintenance and Care: How to Keep Your Wrap Looking Great
Cleaning Your Wrap
- Hand Wash Recommended: Avoid automatic car washes, as they can damage the wrap.
- Mild Detergent: Use soap that’s gentle on the vinyl and doesn’t contain harsh chemicals.
- Frequency: Regular cleaning prevents dirt buildup, which can degrade the wrap over time.
Protecting the Wrap
- Sun Protection: Where possible, park in shaded areas to prevent UV damage.
- Avoid Abrasives: Harsh brushes or sponges can scratch the surface.
How Long Do Vehicle Wraps Last?
The lifespan of a wrap varies based on material quality, installation technique, and maintenance. Typically:
- Cast Vinyl Wraps: Last 5-7 years with proper care.
- Calendared Vinyl Wraps: Have a shorter lifespan, usually around 3-5 years.
Wrap Removal: What Happens When It’s Time to Say Goodbye
Removing a vehicle wrap is a straightforward process, especially if done by professionals. The wrap can be heated and peeled away, often leaving the paint underneath in pristine condition.
Conclusion: Why Vehicle Wraps Are Worth the Investment
Vehicle wraps are more than just a trend—they’re a versatile, cost-effective way to customize or advertise using your vehicle. Whether you’re a business looking for mobile marketing or just someone who wants a unique ride, a well-done wrap can make all the difference.
Read also: Top 10 Vehicle Wrap Companies
FAQs
Yes, but it’s recommended to have professionals handle it, especially for larger or complex surfaces.
Depending on the size and complexity of the vehicle, installation can take anywhere from 1 to 3 days.
No, wraps generally protect the paint underneath. However, improper installation or removal can cause damage.
Yes, individual sections of the wrap can often be replaced without needing to redo the entire vehicle.
Prices vary but typically range from $2,000 to $5,000 for a full wrap, depending on the size of the vehicle and materials used.